Generating Your MCP Credentials
MCP access requires an active trial, an active Enterprise subscription, or specific enablement for your workspace. You must have the Owner, Admin, or Member role; Viewer and Collaborator roles cannot access MCP.
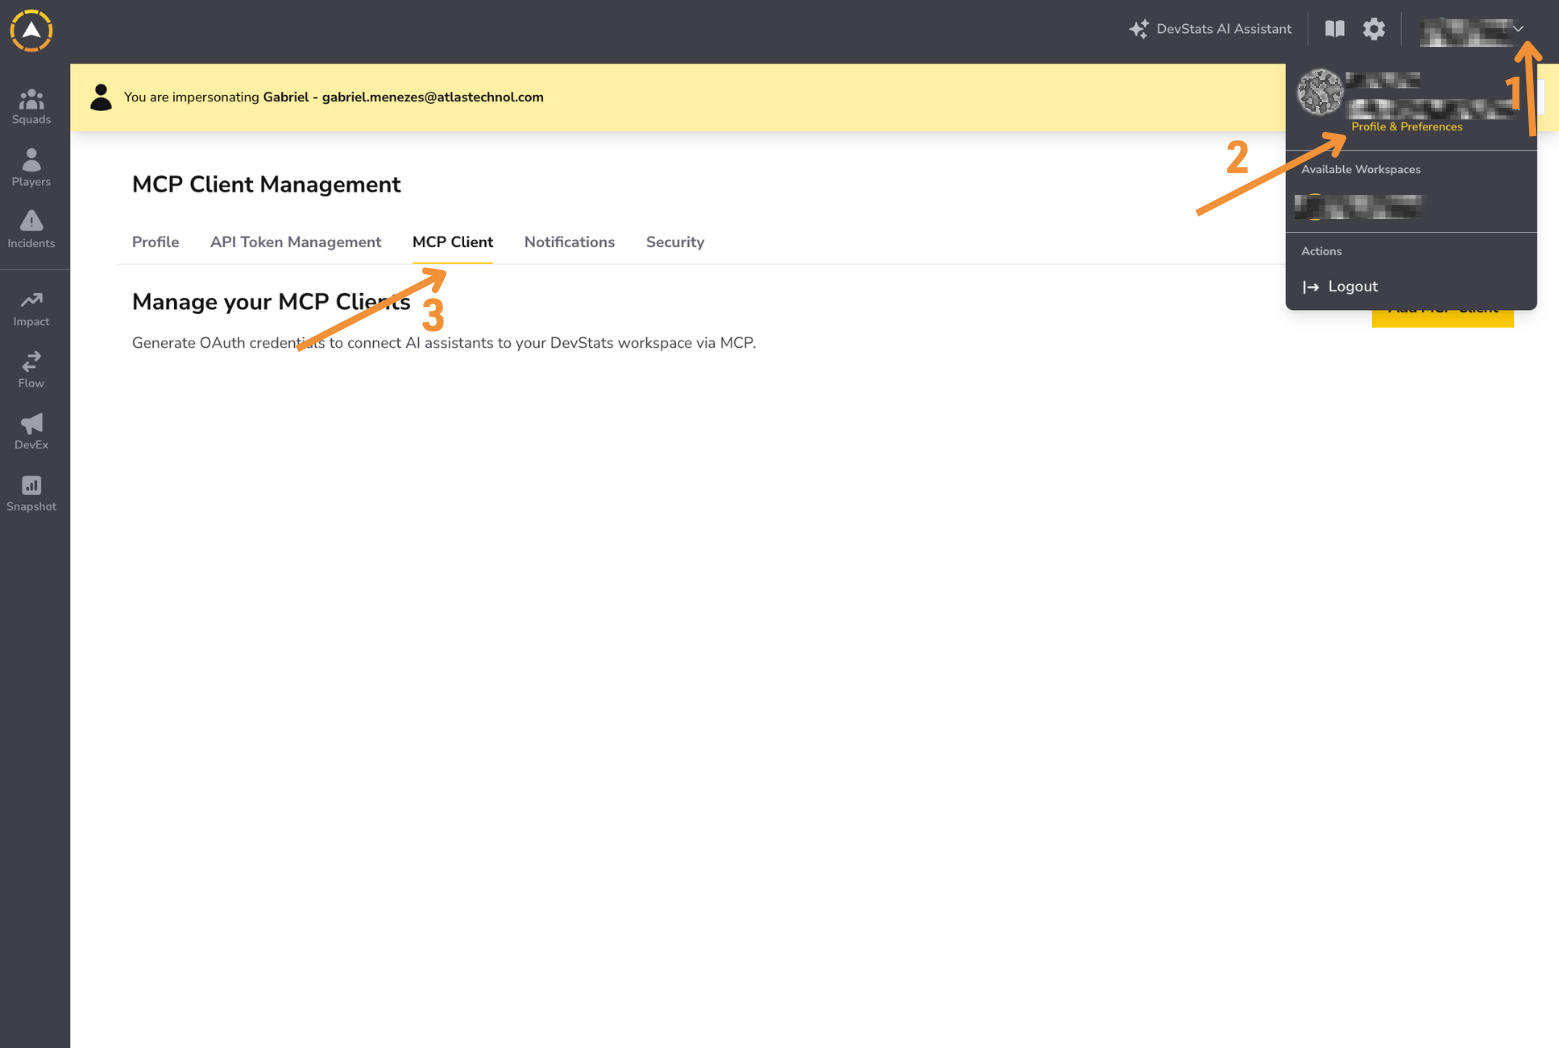
Step 1: Click your profile in the top right corner and go to Profile & Preferences. Click the MCP Client tab.
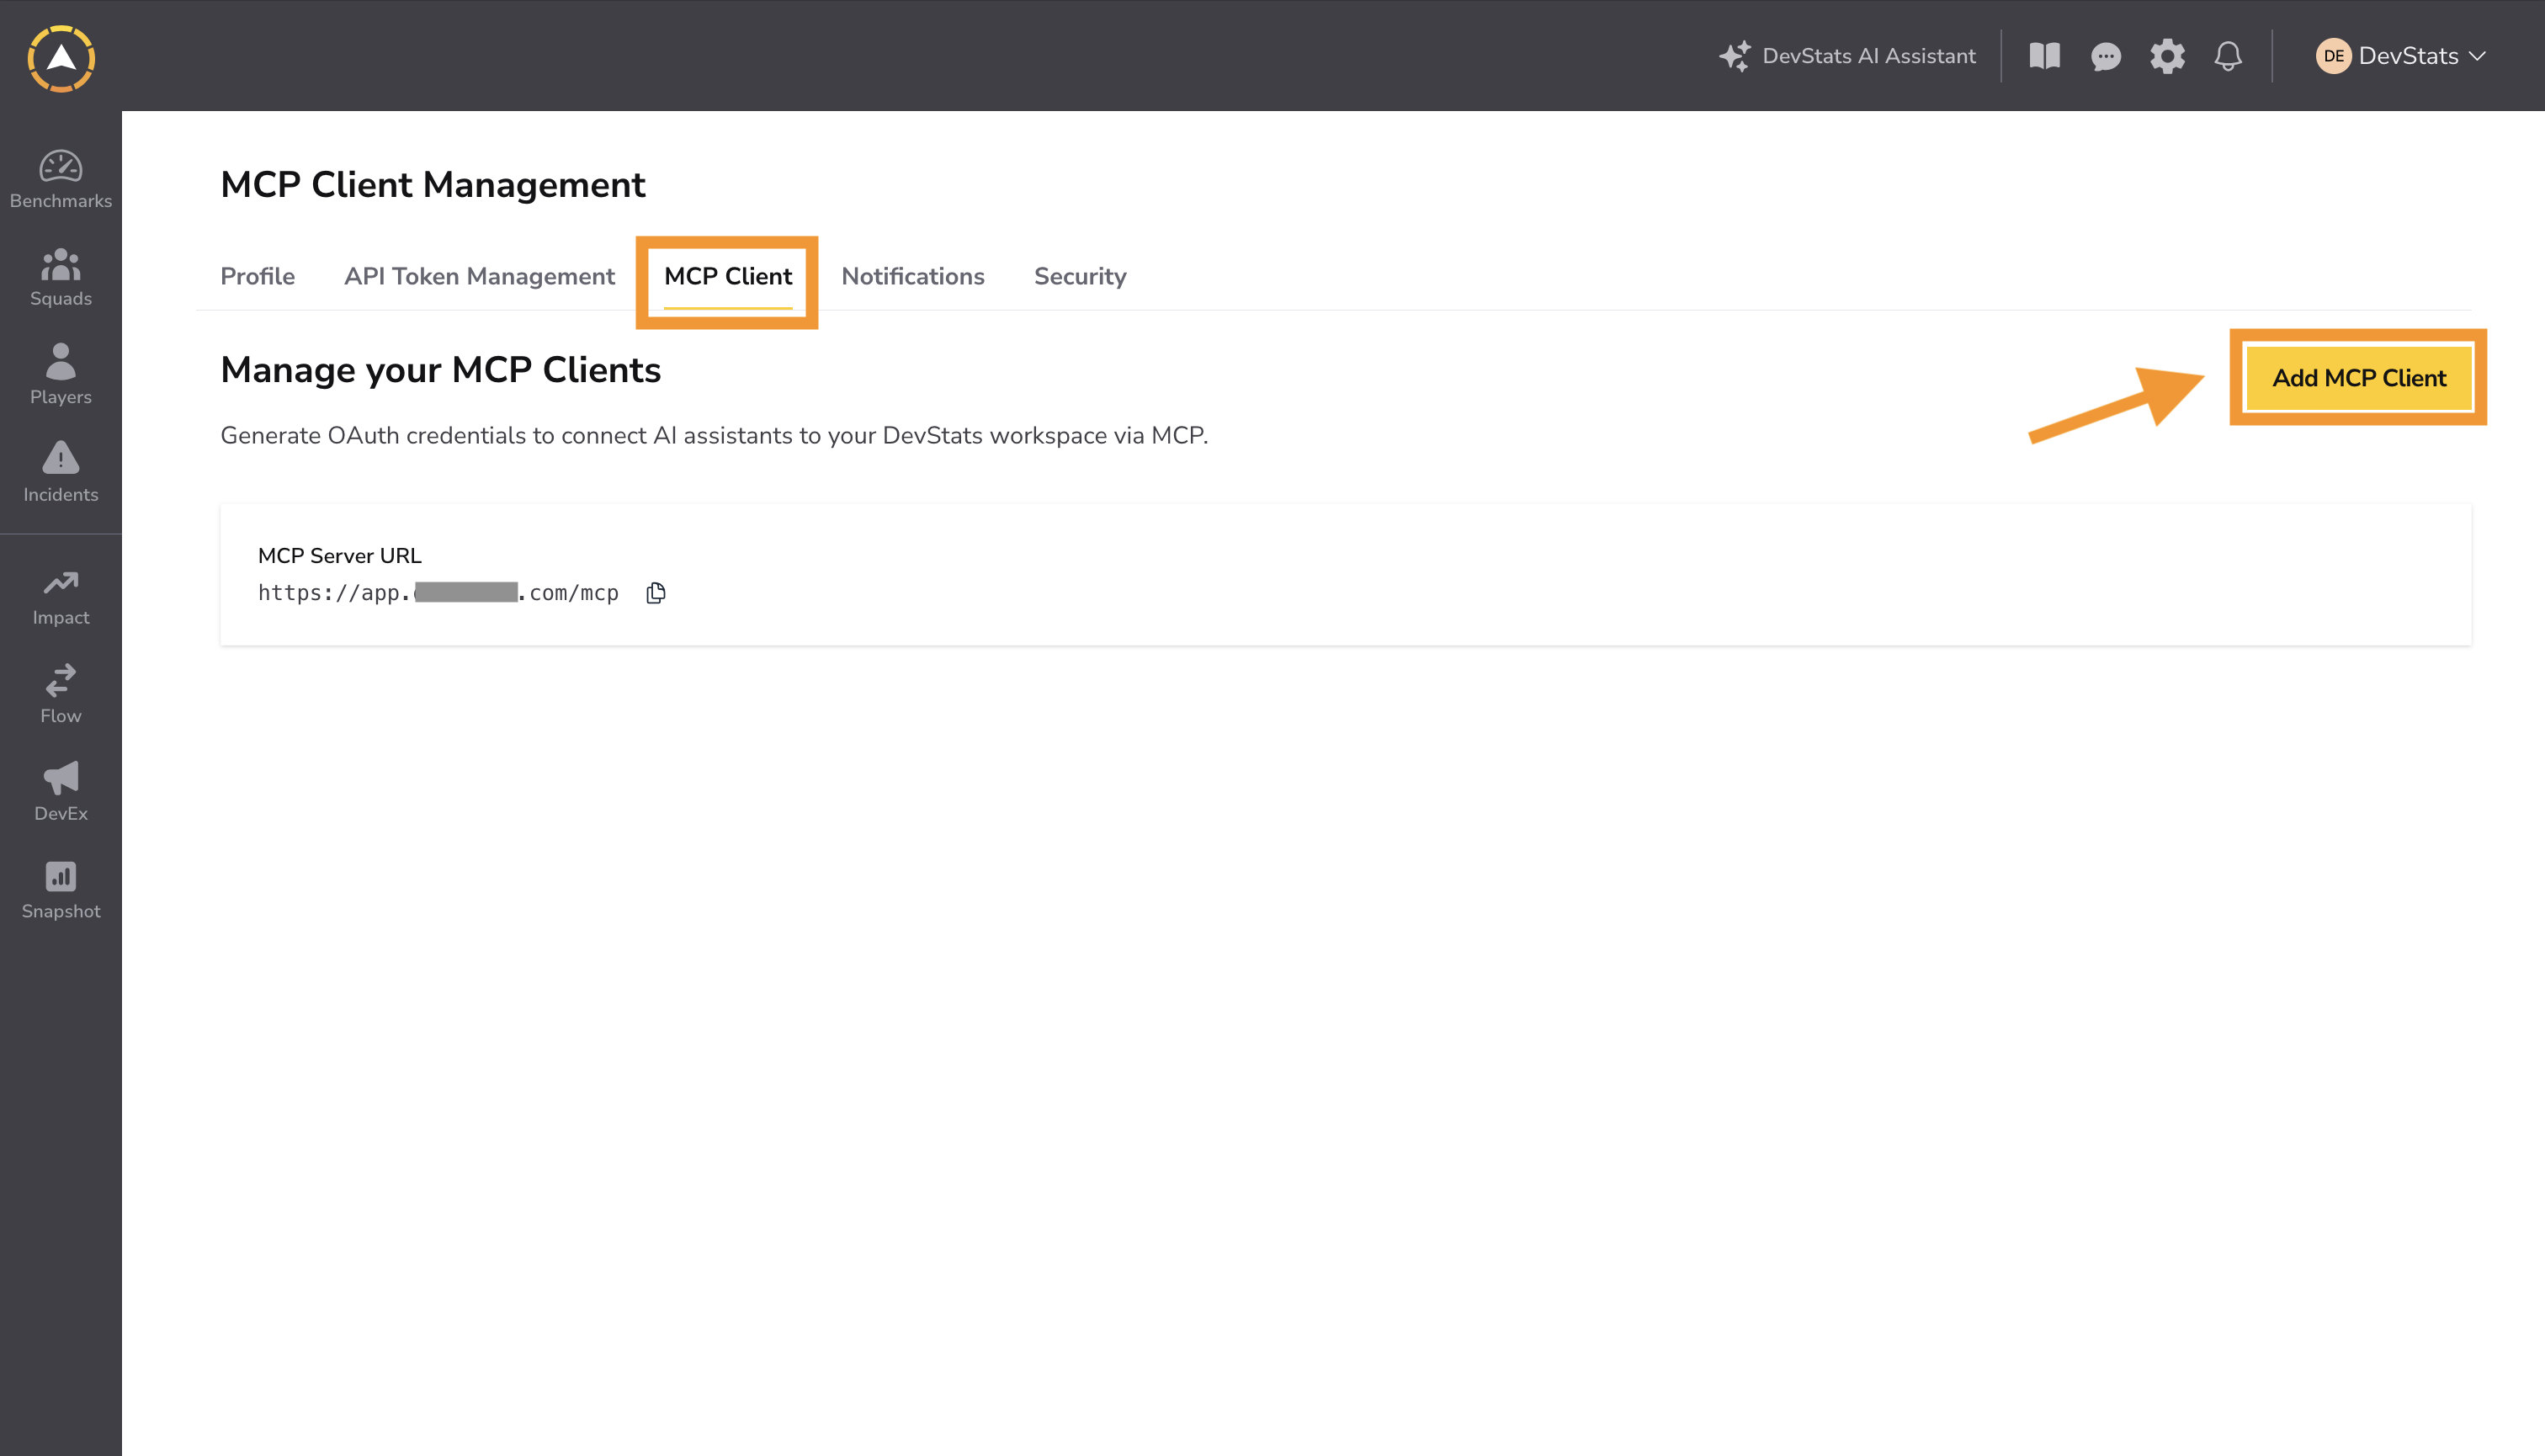
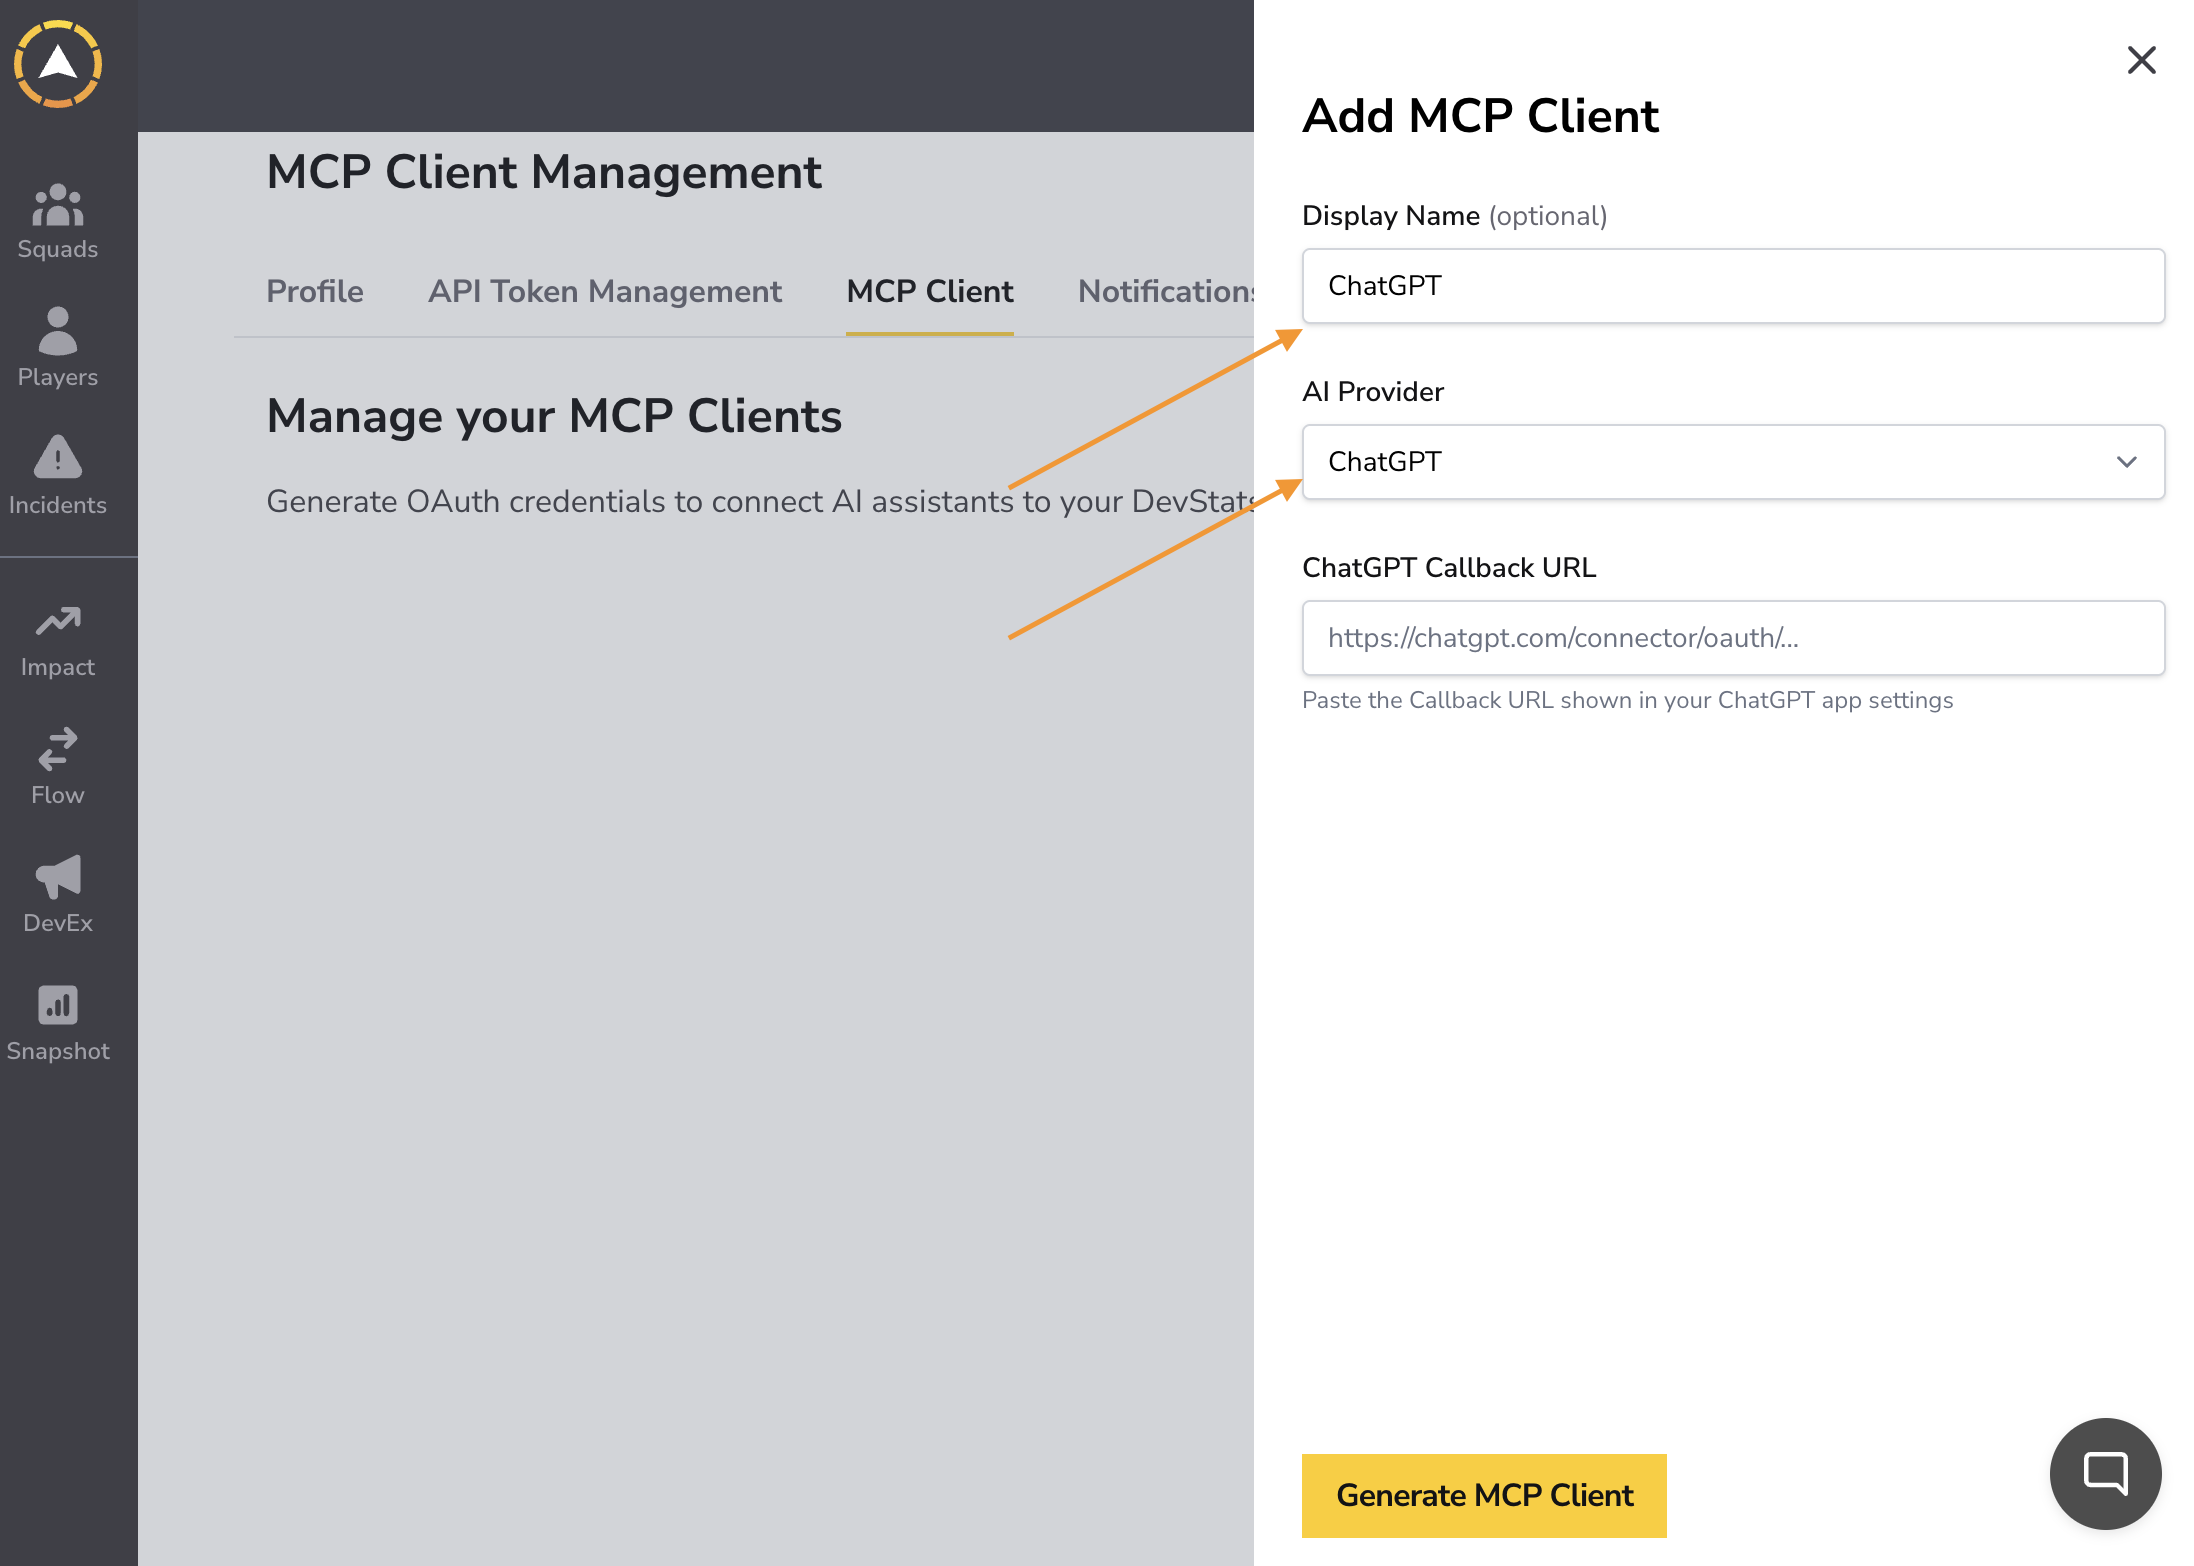
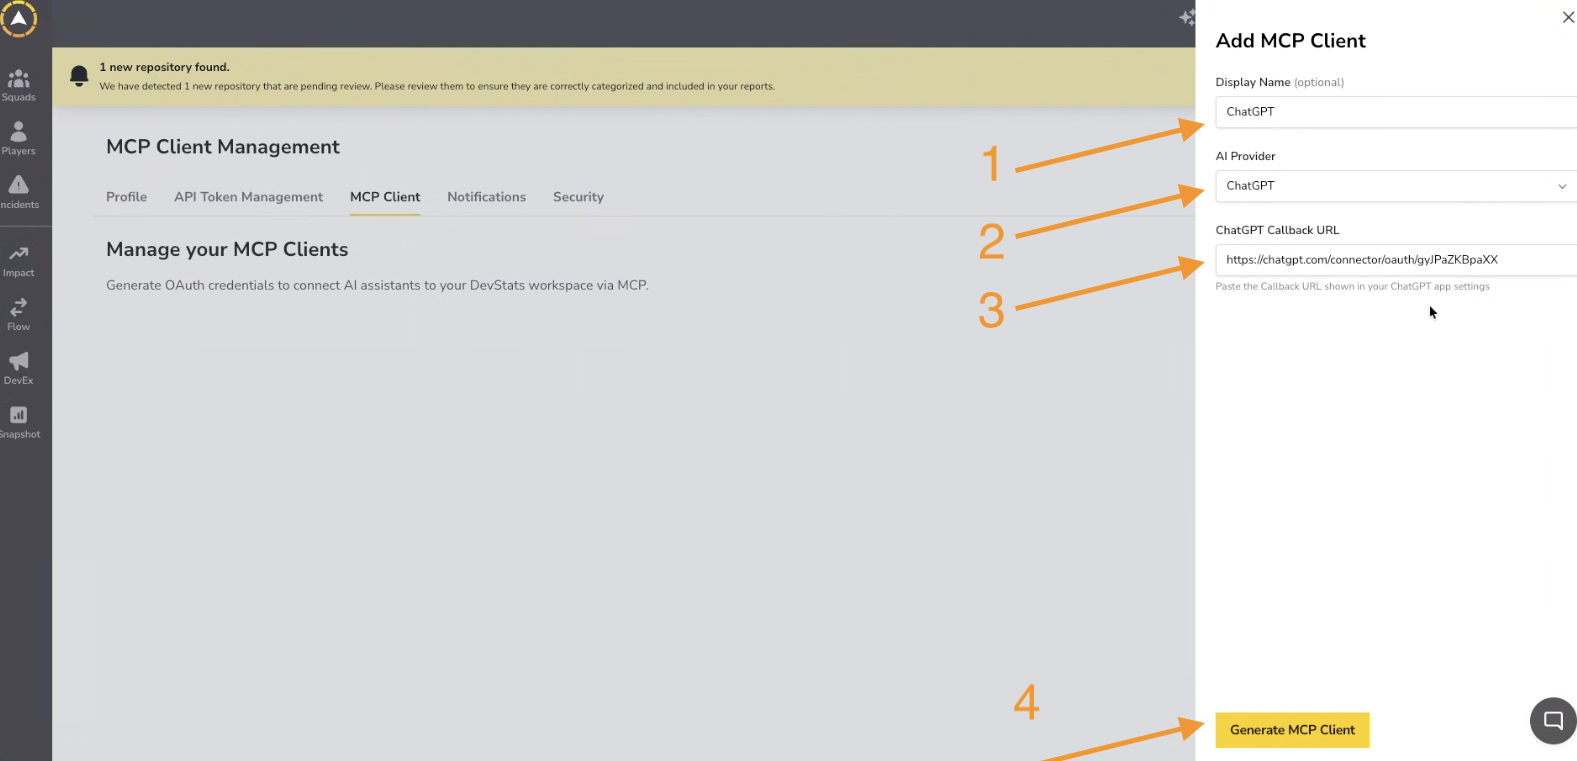
Step 2: Click Add MCP Client. Optionally add a display name, then select ChatGPT as the AI provider. Do not click Generate yet, you will need the callback URL from ChatGPT first.
Setting Up ChatGPT
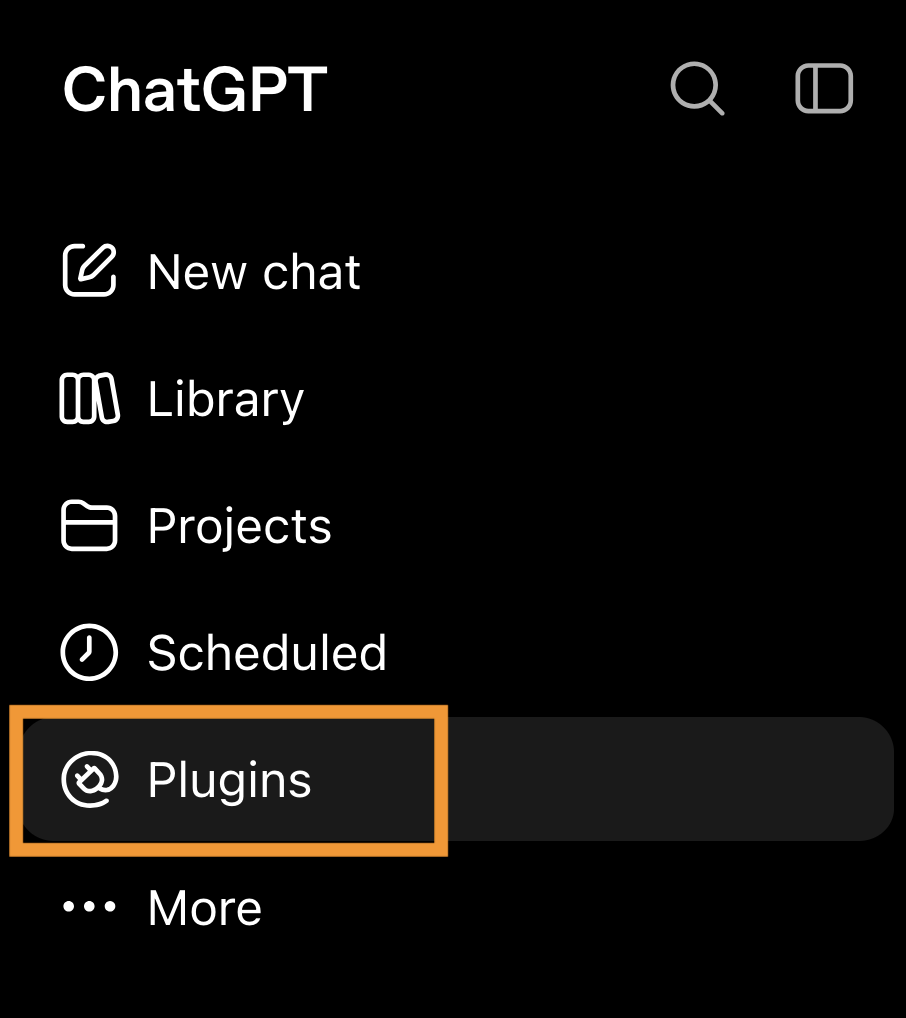
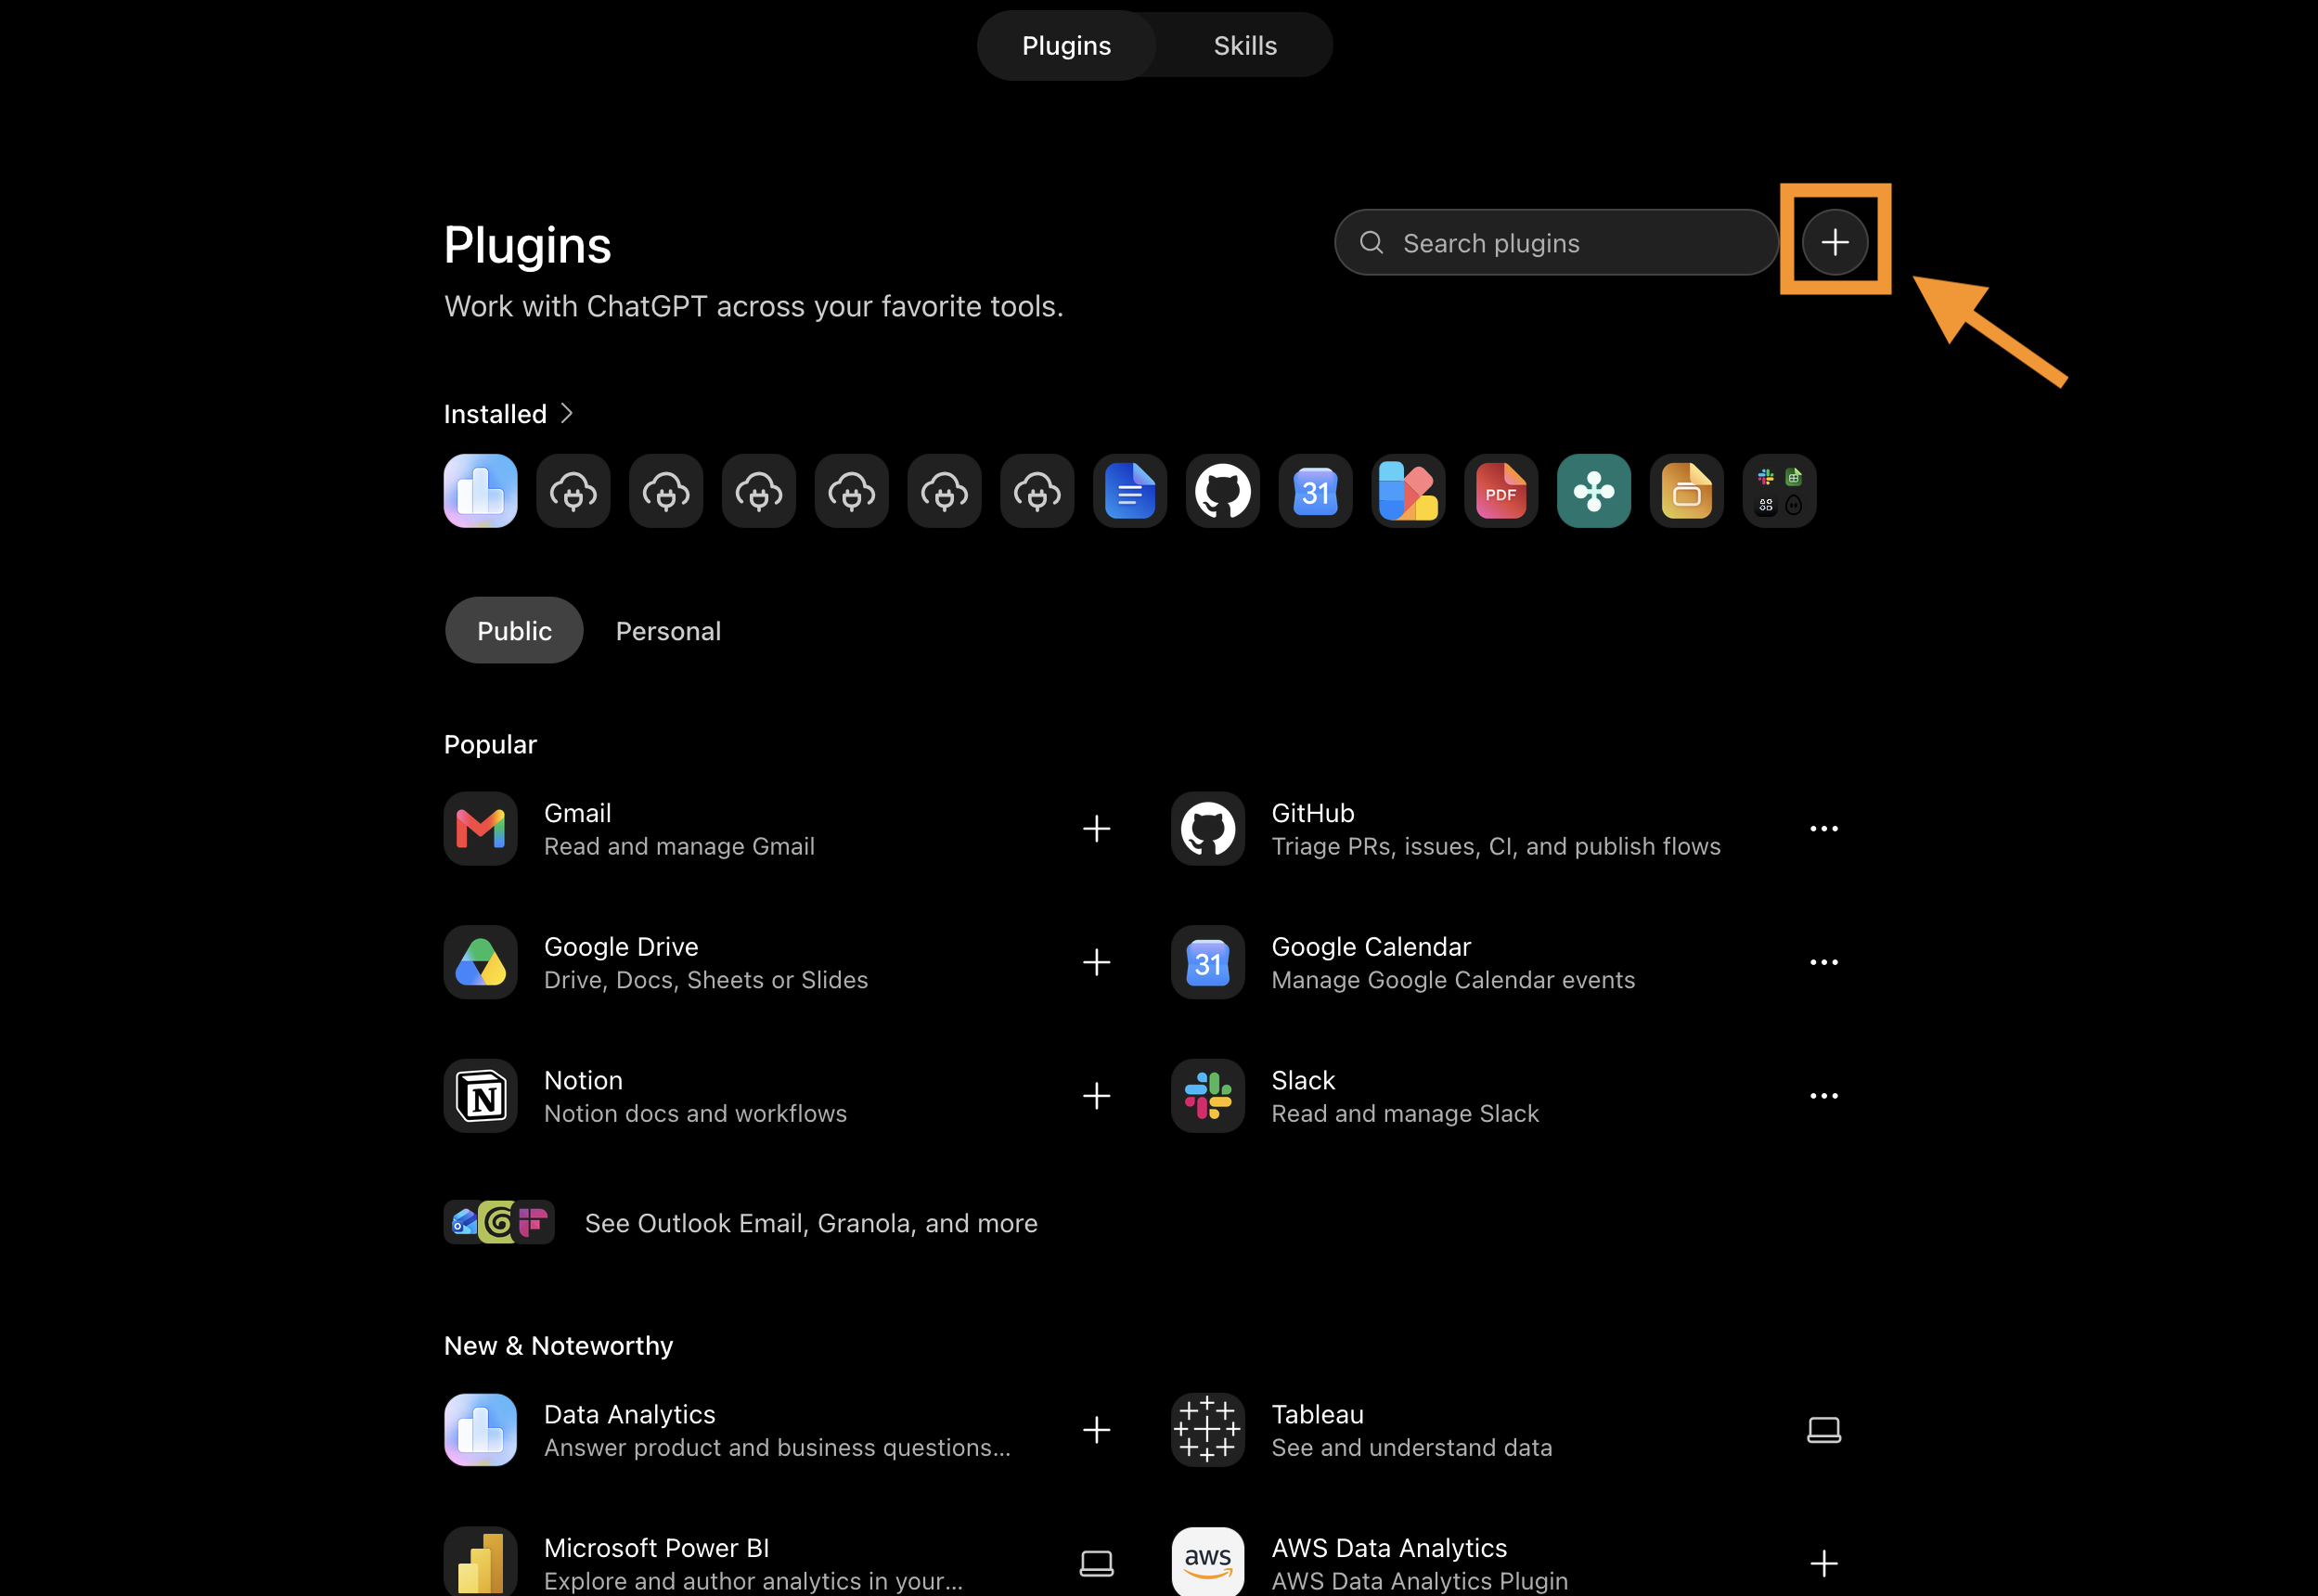
Step 3: In ChatGPT, open Plugins from the sidebar.
Step 4: Click the + button next to the plugin search field.
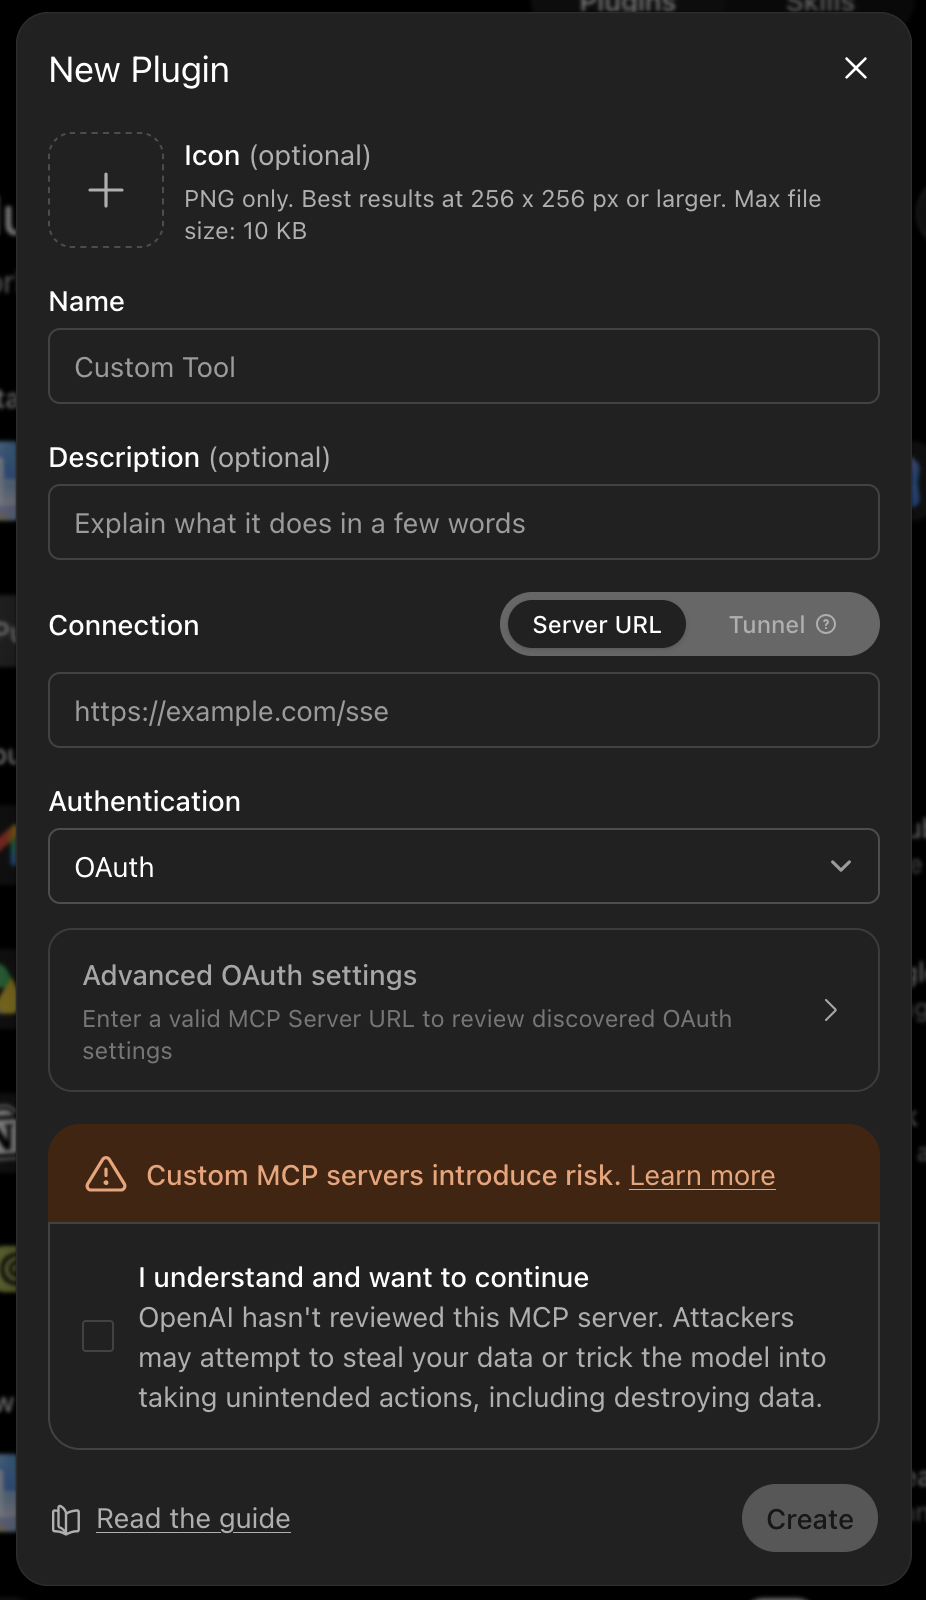
Step 5: In New Plugin, enter a name such as DevStats, select Server URL, enter the DevStats MCP server URL (https://app.devstats.com/mcp), and select OAuth for authentication.
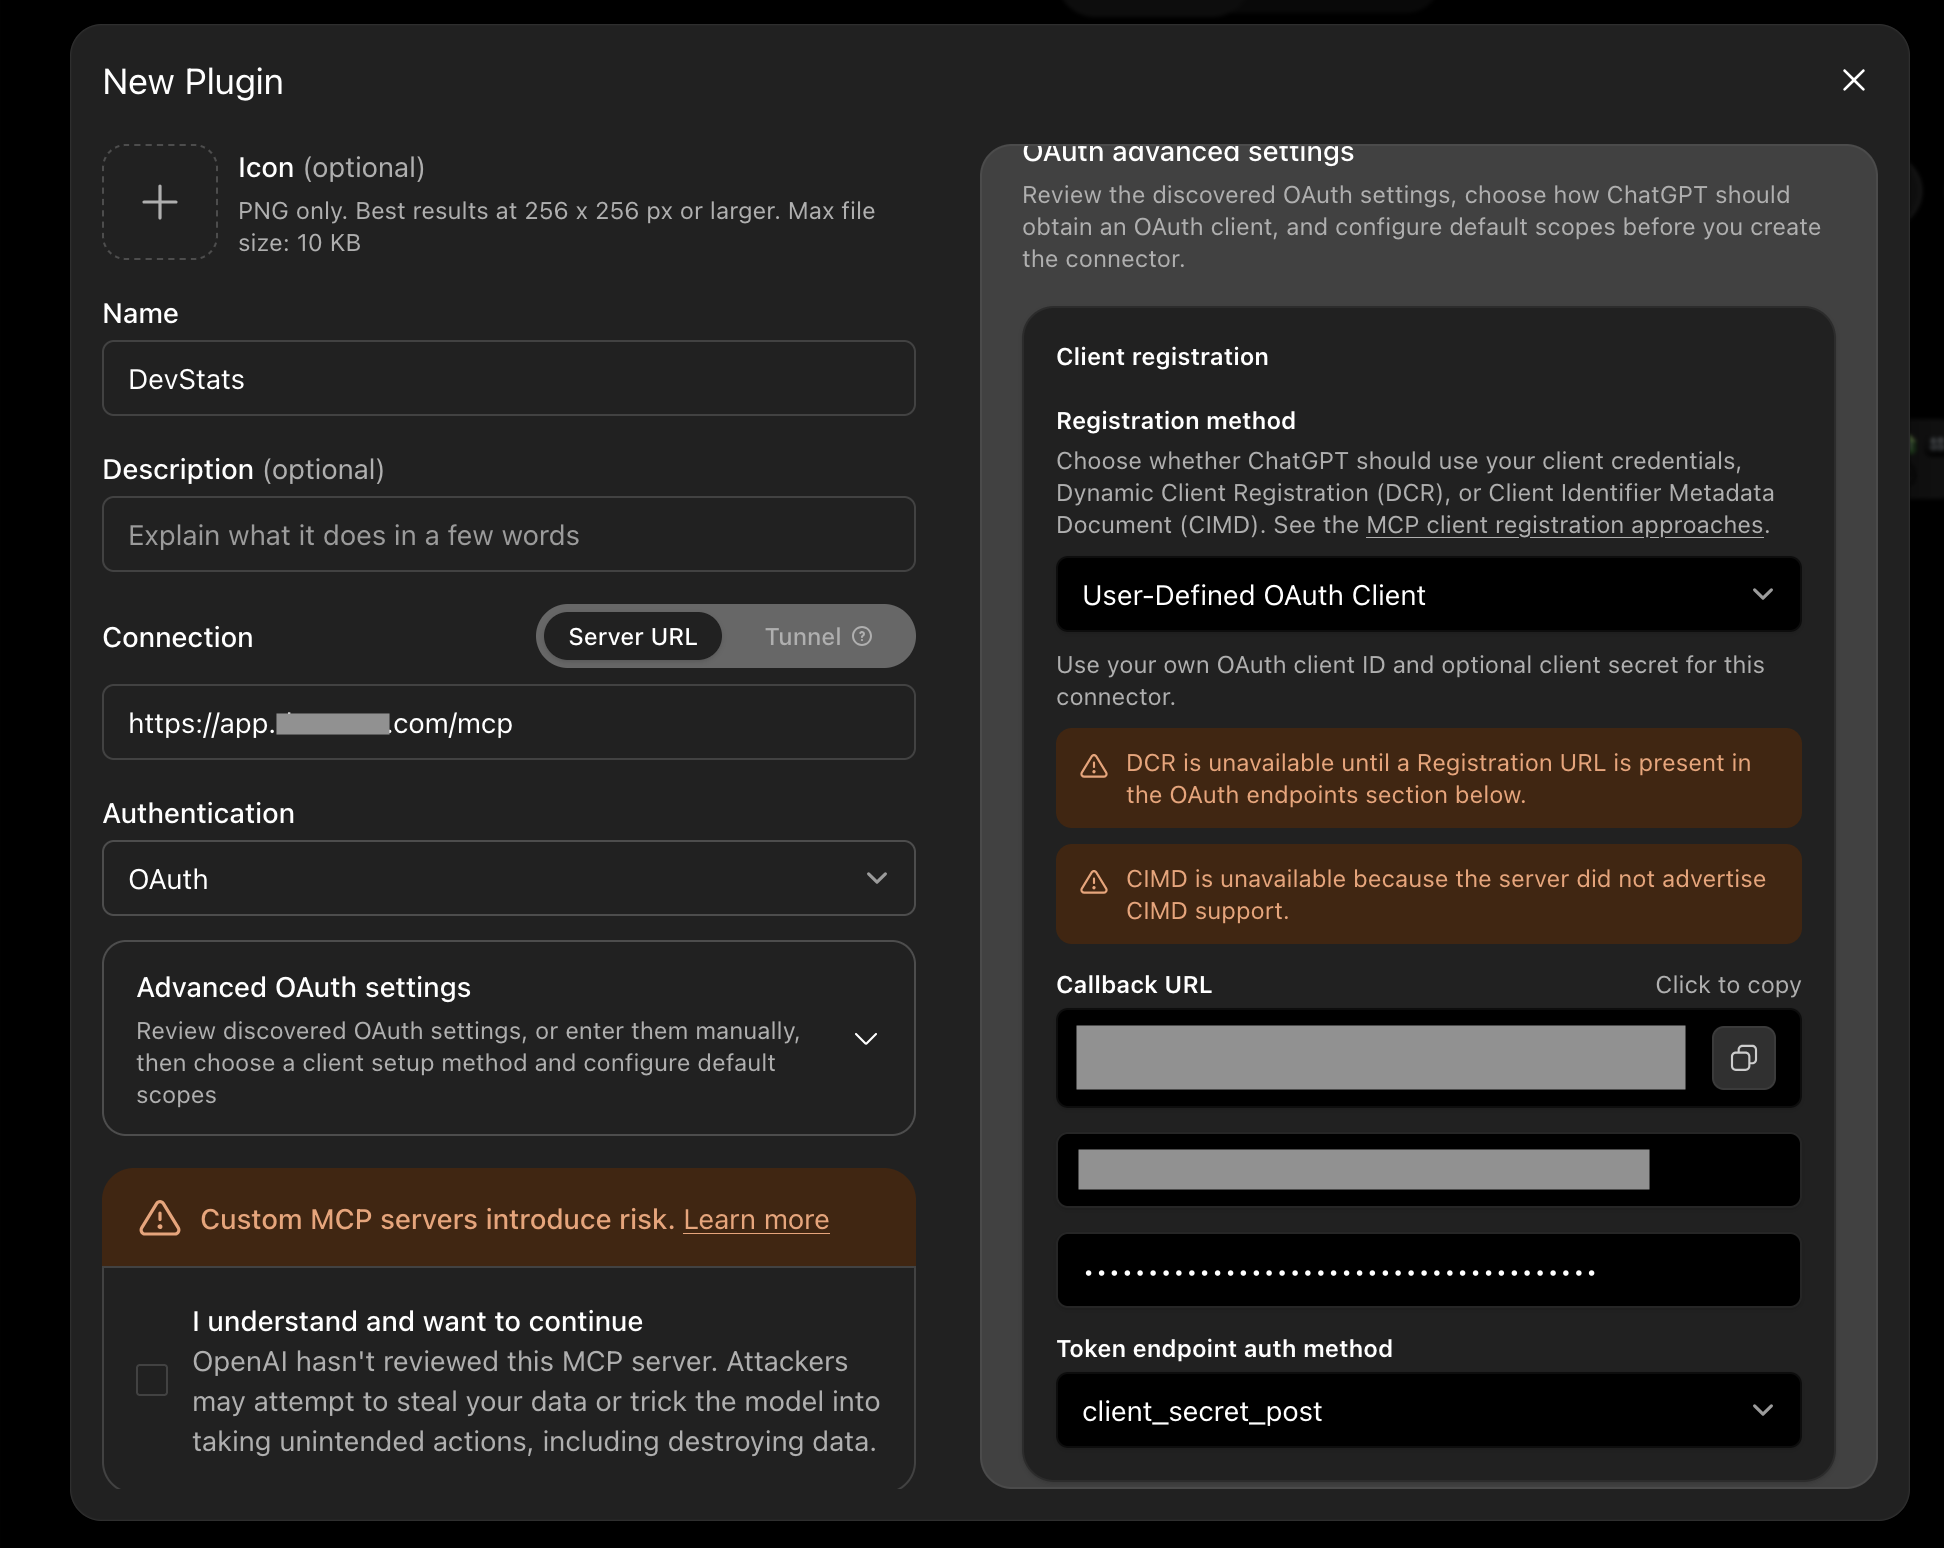
Step 6: Open Advanced OAuth settings and select User-Defined OAuth Client as the registration method. Copy the Callback URL shown, you will need it in the next step. Do not click Create yet.
Back to DevStats
Step 7: Return to DevStats and paste the ChatGPT callback URL into the ChatGPT Callback URL field. Click Generate MCP Client and copy the Client ID and Client Secret.
Finishing the ChatGPT Setup
Step 8: Back in ChatGPT, enter the Client ID and Client Secret from DevStats in Advanced OAuth settings. Set Token endpoint auth method to client_secret_post. Review the custom MCP server warning and, if you agree, select I understand and want to continue, then click Create.
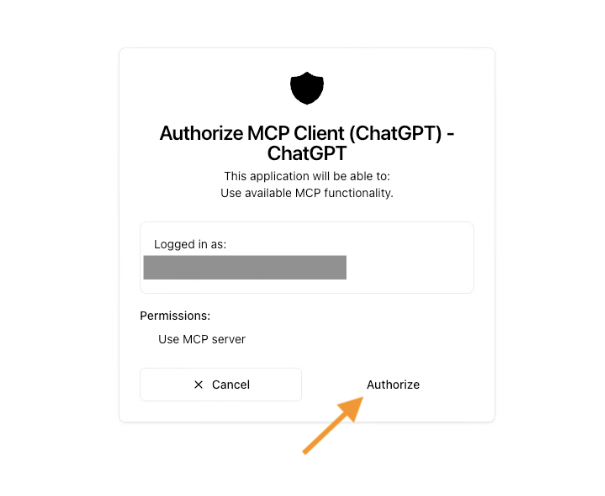
Step 9: When redirected to the authorization screen, click Authorize.
Step 10: The connection is now active.